Complete Anatomy
Windows manual installation – SCCM
1.
Click here to download the latest version of Complete Anatomy.
2.
Navigate to the directory where you downloaded the file (usually Downloads).
3.
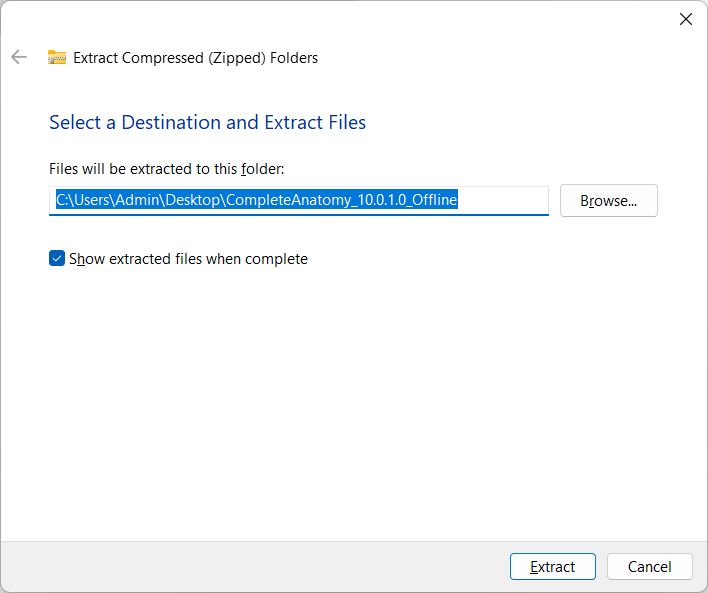
Right-click on the file and choose Extract All ... (Make sure Show extracted files when complete is checked. Then click Extract.
4.
In the window that opens, make sure that Show extracted files when complete is checked and then click Extract.
5.
When extraction completes the windows will open with the files that are necessary to install Complete Anatomy on your device.
Note: If you did not check Show extracted files when complete in step 4, then the window like on step 7 won’t appear automatically. In this case you need to go to the Downloads folder and go to folder CompleteAnatomy_Latest_Offline_x64. Please note that there must not be a zip on the icon on the CompleteAnatomy_Latest_Offline_x64 folder.
Creating the package via SCCM
Note: If you are prompted by the Wizard during the create application process to point to any dependencies, you can ignore this step as no dependencies are required.
1.
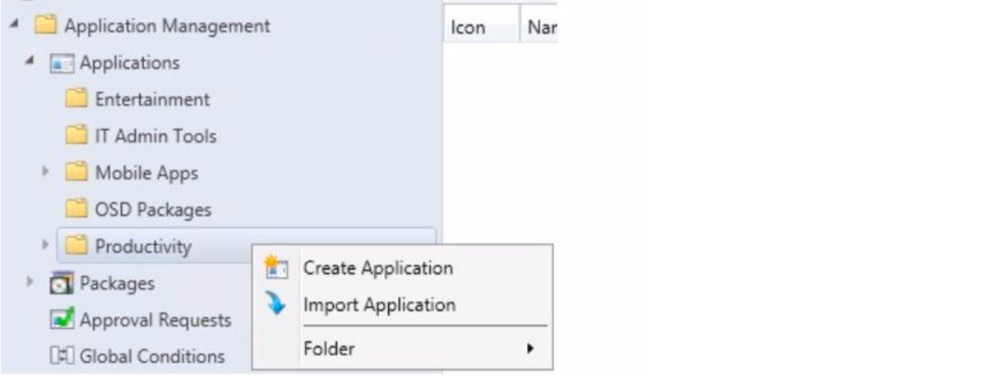
Once the files have been downloaded, we can deploy the application via System Center Configuration Manager. In the ConfigMgr admin console, go to Software Library > Application Management > Applications. Right-click and choose Creation Application. This will open the Create Application Wizard.
2.
Choose the Windows app package, a file with the *.appxbundle extension in the root of your unzipped folder, and specify the file location. Click Next.

3.
The next page will show you that the file imported successfully. If any prerequisites are missing from the folder the application is stored in, you will see a warning. Click Next.
If ConfigMgr was able to successfully identify the appx/appxbundle plus all prereqs, you should see a screen similar to this:
4.
On this page you can specify items such as the Name, Publisher, and Administrative Category for the app. Please use the following details:
Name: Complete Anatomy
Publisher: 3D4Medical Ltd
Administrative Category: “Your own choice”
Click Next
Note: Do not change the software version.
5.
This page will display a summary of all the settings from the previous pages of the Create Application Wizard. Click Next.
6.
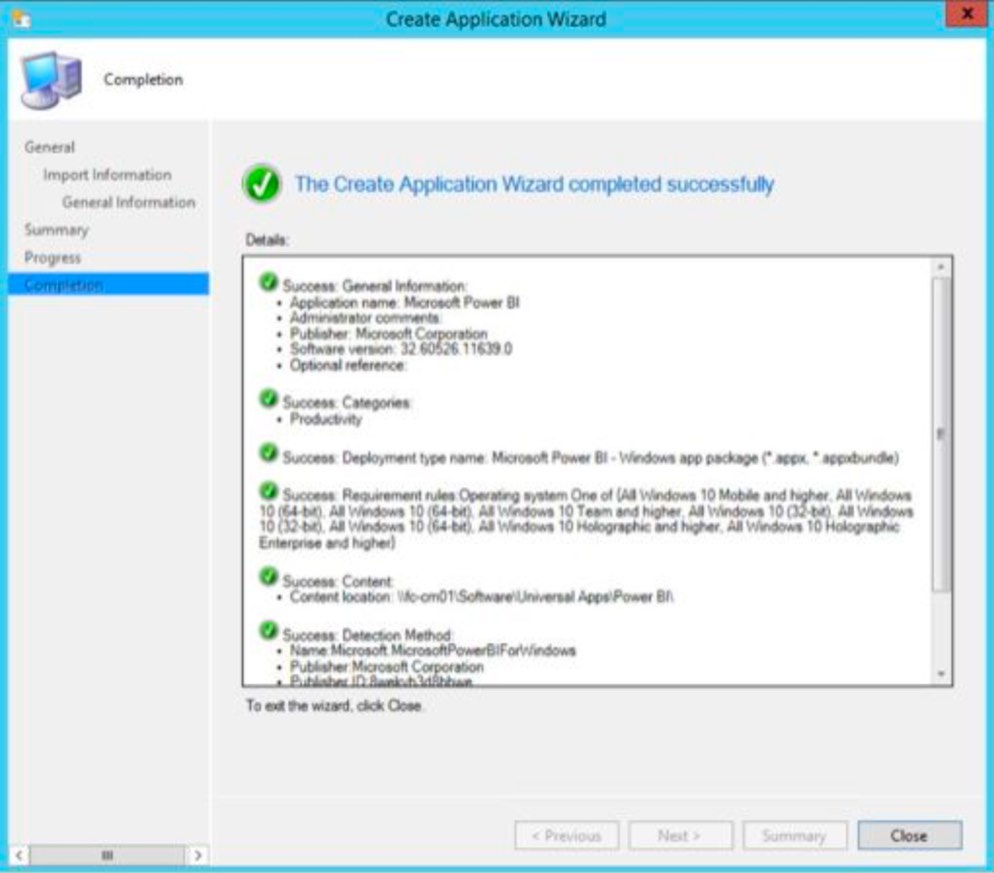
Configuration Manager will begin to create the Complete Anatomy application. Once completed you will see the following screen confirming it has been completed:
Deploying the package via SCCM:
1.
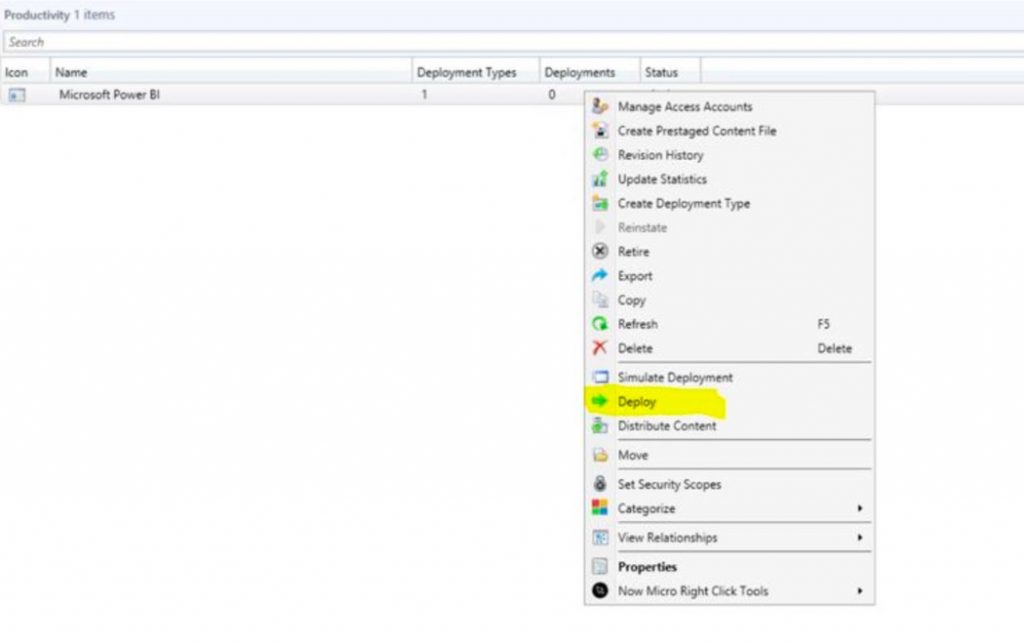
In the System Center Configuration Manager console, right-click on the Complete Anatomy application which was just created and choose Deploy.
2.
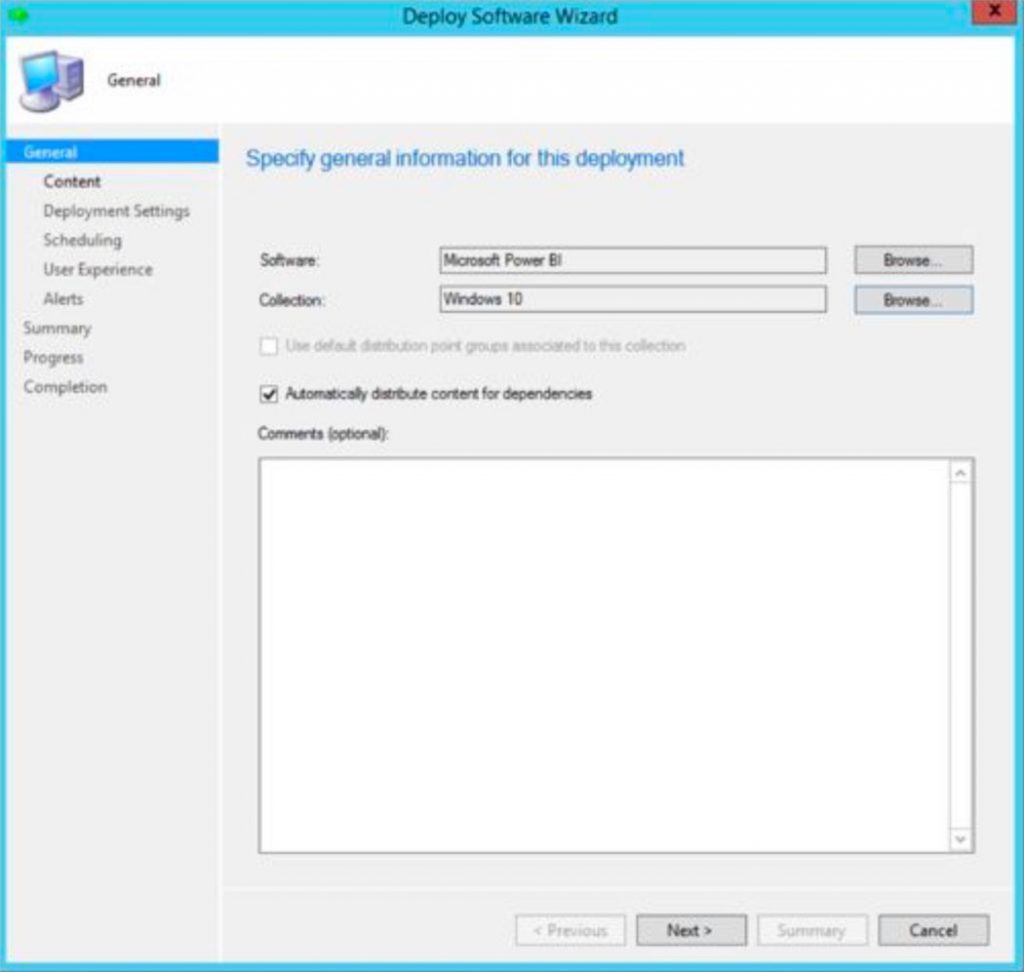
Choose a Collection to deploy the Complete Anatomy application to. In this case, the application is deployed to a collection of all Windows machines. Click Next.
3.
Choose a Distribution Point to distribute the Complete Anatomy app. Click Next.
4.
On the Deployment Settings page, choose whether Complete Anatomy will be deployed as Available or Required. Click Next.
5.
On the Scheduling page, choose when the application will be available for users to install. Click Next.
6.
On the User Experience page, choose how users will be notified of the app install. Click Next.
7.
On the Alerts page, choose if you want to be alerted for failed deployments and System Center Operations Manager alerts. Click Next.
8.
The Summary page will display a list of all settings chosen for the Deploy Software Wizard. Click Next.
9.
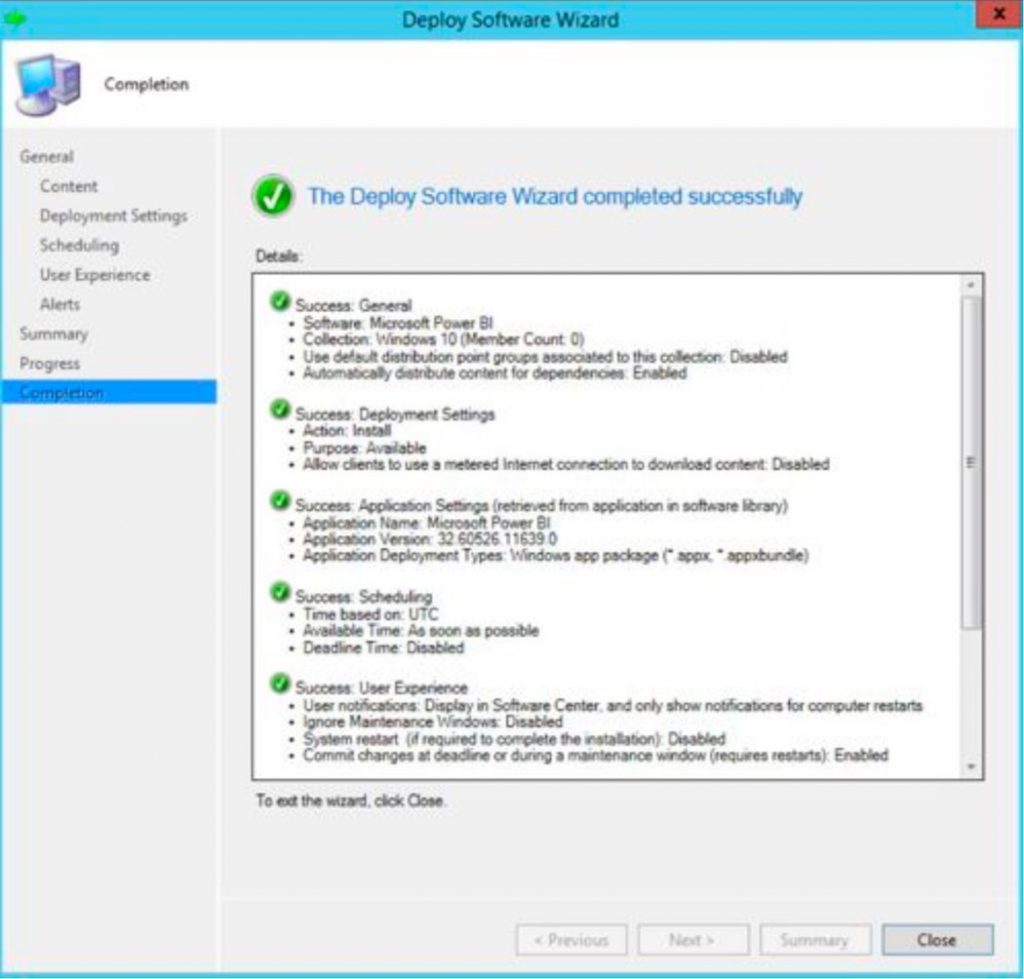
Configuration Manager will begin creating the application. Once complete, you should see this page:
10.
Click on the Windows button and open Software Center. The Complete Anatomy app should now be listed in Software Center.
11.
Click Install to install the app.
12.
Complete Anatomy should now be available in the Start Menu.